
If you’re looking to enhance your website’s SEO and help search engines like Google index your content more efficiently, you’ve come to the right place. Today, we’re going to learn how to create an XML sitemap for your WordPress website.
For this tutorial, we will use the Rankmath Plugin

You can find that here - it’s free
What is an XML Sitemap?
An XML sitemap is a file that lists all the important pages and content on your website in a structured format that search engines can understand. It helps search engine crawlers navigate your site, discover new content, and rank your pages more accurately in search results.
It’s like a Table of Contents for Search Engines ![]()
Install and Activate RankMath SEO Plugin
To create an XML sitemap in WordPress, you’ll need an SEO plugin. Some popular options include Yoast SEO, All in One SEO Pack, and Rank Math. Choose one that suits your needs and install/activate it.
For this tutorial, we will use Rankmath.
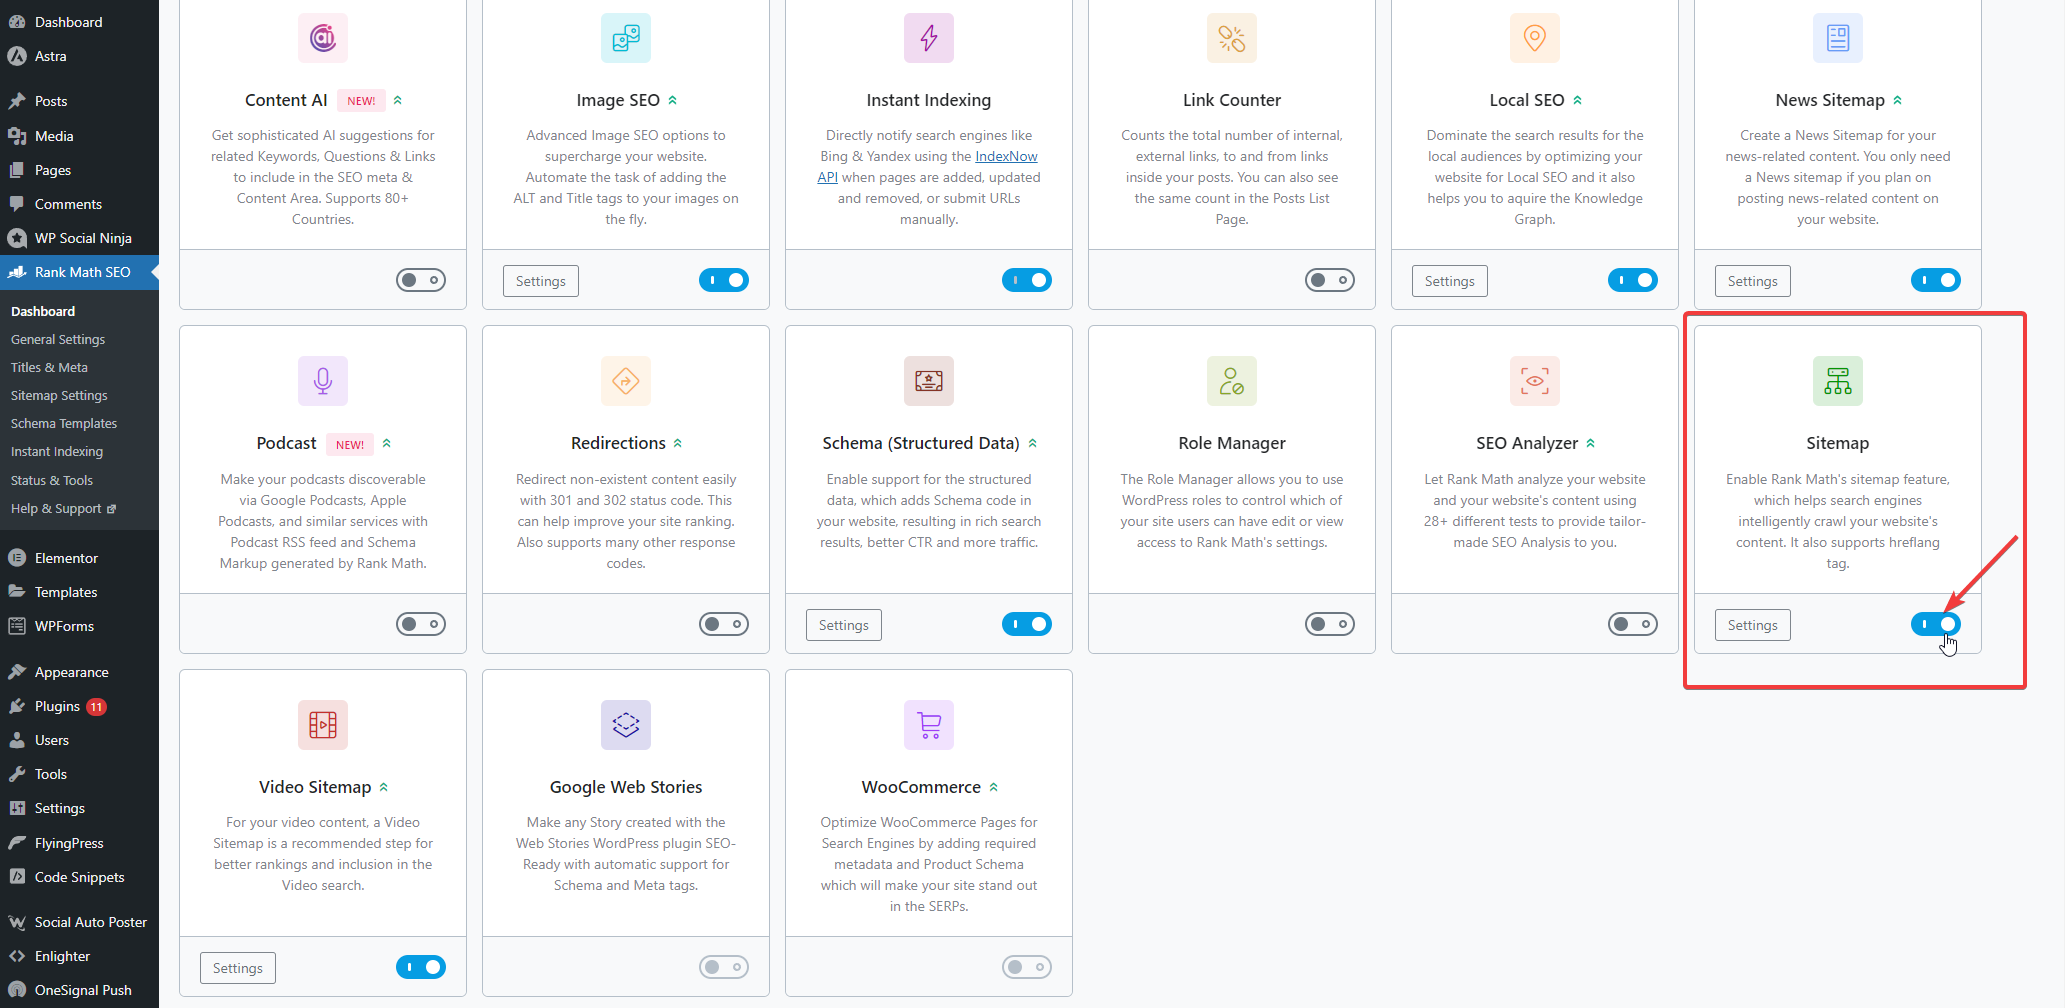
Step 2: Enable XML Sitemap Functionality
Once you’ve installed the SEO plugin, go to your WordPress dashboard, and find the plugin’s settings. Look for an option related to XML sitemaps and enable it. In most cases, this option is easy to find and activate.
For Rankmath, it’s here:
Step 3: Configure XML Sitemap Settings
After enabling the XML sitemap functionality, you’ll usually have the option to configure some settings. Common settings include:
- Excluding Specific Content: You can choose to exclude certain post types (e.g., pages, categories, tags) from your sitemap if needed.
- Priority and Frequency: Some plugins allow you to set the priority and update frequency for different types of content.
- Custom Sitemap URLs: Some plugins may enable you to create custom sitemaps for specific sections of your website.
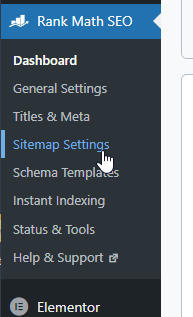
Go to the Sitemap Settings of Rankmath:
Step 4: Generate and Locate Your XML Sitemap
Once you’ve configured the settings, your SEO plugin will automatically generate the XML sitemap(s) for your website. The sitemap URL is typically in the format yourdomain.com/sitemap.xml. You can usually find this link in the plugin settings or on your website’s root directory.
Example
yourwebsite.com/sitemap_index.xml
Submit Your Sitemap to Google
To ensure that Google and other search engines know about your XML sitemap, it’s a good practice to submit it through Google Search Console (formerly known as Google Webmaster Tools). Here’s how to do it:
- Log into Google Search Console: If you don’t have an account, create one and add your website.
- Navigate to Sitemaps: In the Search Console dashboard, click on “Sitemaps” in the left-hand menu.
- Submit Your Sitemap: Enter the URL of your XML sitemap (e.g.,
yourdomain.com/sitemap.xml) and click the “Submit” button.
You’re all set! Your WordPress website now has an XML sitemap that helps search engines discover and index your content. Keep an eye on your sitemap’s performance in Google Search Console, and ensure it’s up to date whenever you add or remove content from your site.
Creating an XML sitemap is a fundamental step in optimizing your WordPress website for search engines. It’s a simple but powerful way to improve your site’s SEO and ensure that your valuable content gets the visibility it deserves.
Feel free to share your experiences, questions, or any additional tips you have regarding XML sitemaps for WordPress in the comments below. Happy optimizing! ![]()